Introduction
Imagine transforming your favorite photo—a cherished pet, a family portrait, or a beautiful landscape—into a one-of-a-kind embroidered keepsake. Thanks to modern technology, convert photo to embroidery pattern is easier than ever, whether you’re a complete beginner or an experienced stitcher.
This guide walks you through the entire process from photo selection to final stitching. You’ll learn multiple conversion methods, discover which tools work best for different image types, and pick up professional tricks to achieve stunning results without expensive equipment.
Why Convert Photo to Embroidery Pattern?
Custom photo embroidery offers unique advantages:
- Personalized Gifts – Create meaningful presents no one else can buy
- Memory Preservation – Stitch special moments into lasting heirlooms
- Business Opportunities – Offer custom portrait services
- Creative Expression – Blend photography and textile arts
- Cost Effectiveness – Make professional-looking designs at home
Understanding the Conversion Process
Converting photos to embroidery patterns involves several key steps:
- Photo Selection – Choosing images that will stitch well
- Image Preparation – Editing for optimal conversion
- Digitizing – Translating pixels to stitches
- Stitch Optimization – Adjusting for fabric and thread
- Testing – Perfecting the final pattern
Choosing the Right Photos
Not all images convert equally well. Look for:
✔ High contrast – Clear separation between subject and background
✔ Good lighting – Even illumination without harsh shadows
✔ Simple compositions – One main focal point works best
✔ Distinct features – Eyes, facial features, or clear outlines
Poor choices include:
- Low-resolution/blurry images
- Photos with busy backgrounds
- Images with subtle gradients
- Group shots with small faces
Method 1: Free Online Converters
Best for quick, simple projects:
Recommended Tools:
- Online-Convert.com – Basic photo to pattern conversion
- EmbroideryDesigns.com – Free account required
- Pic2Pat.com – Specializes in cross-stitch but useful for inspiration
Pros:
- No software to install
- Instant results
- Good for testing concepts
Cons:
- Limited control over output
- Quality varies
- File size restrictions
Method 2: Mobile Apps
Great for on-the-go creativity:
Top Apps:
- StitchSketch (iOS) – $4.99, good for simple designs
- EmbroiderModder (Android) – Free with in-app purchases
- Pattern Keeper – Helps manage complex designs
Advantages:
- Work directly from phone photos
- Some include editing tools
- Share designs instantly
Limitations:
- Small screen challenges
- Fewer advanced features
- May lack professional finishes
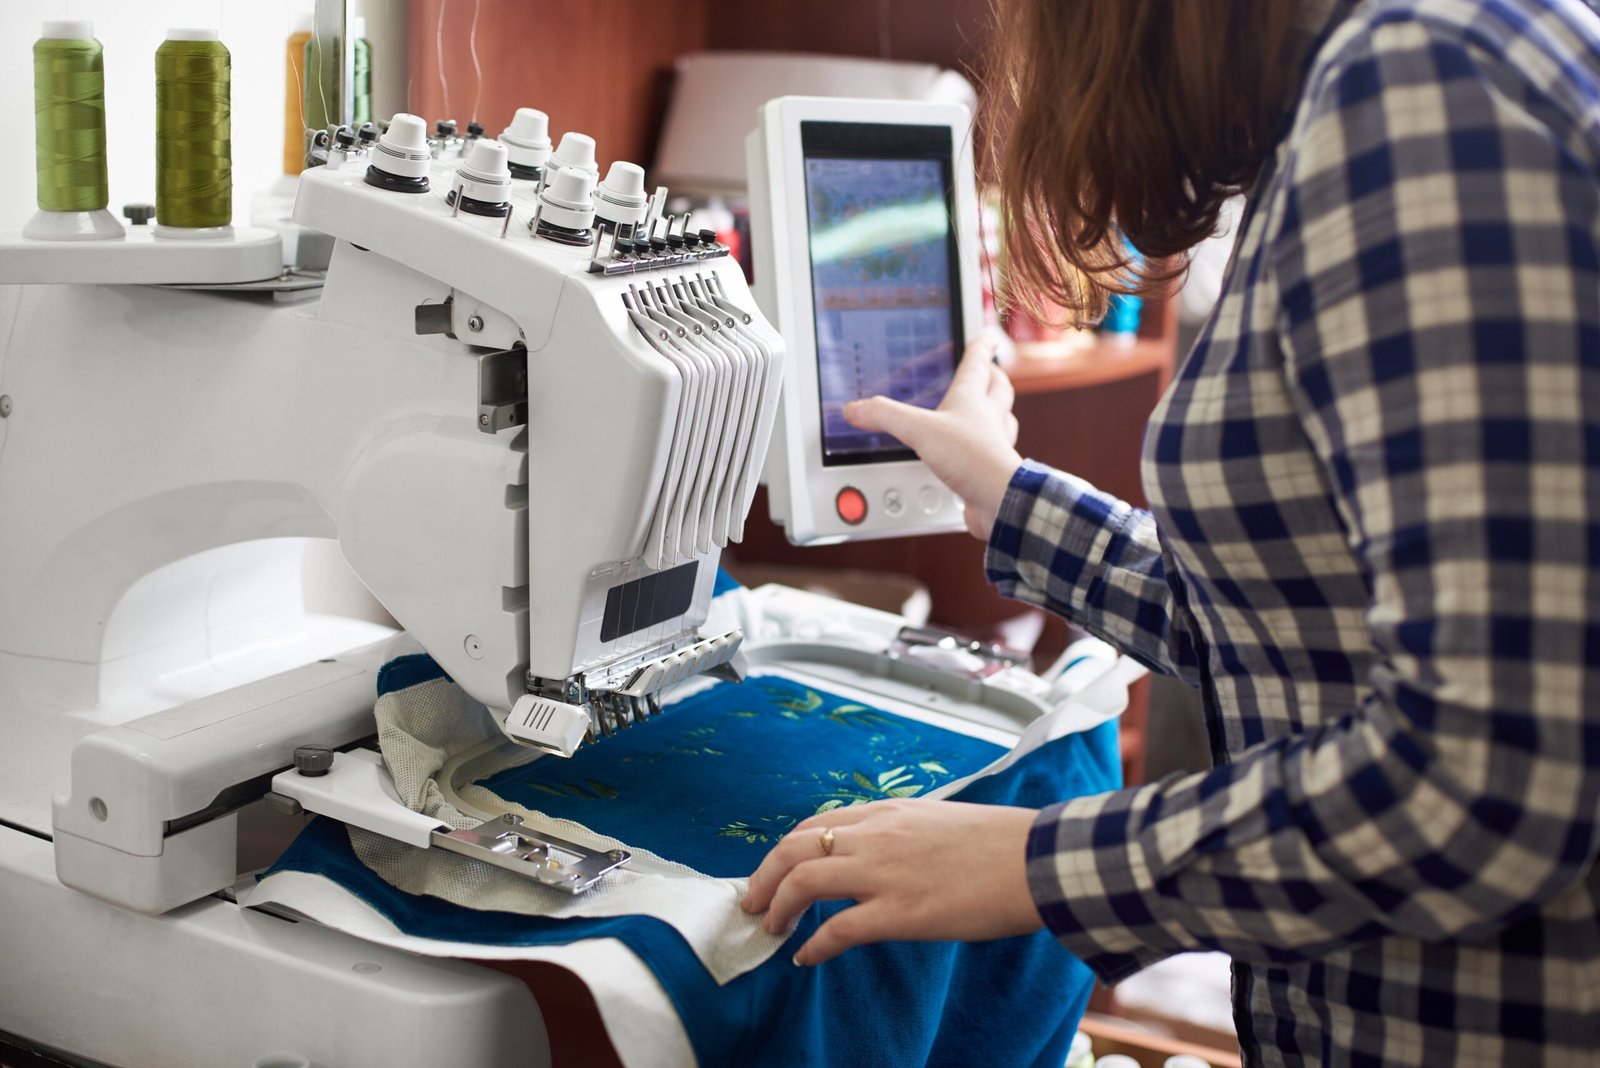
Method 3: Dedicated Software
For professional-quality results:
Best Programs:
- Hatch Embroidery ($599) – Excellent auto-digitizing
- SewArt ($70) – Affordable entry-level option
- Wilcom TrueSizer (Free basic version)
Key Features:
- Precise stitch control
- Advanced editing tools
- Professional file output
- Stitch simulation previews
Step-by-Step Conversion Process
Follow this workflow for best results:
1. Prepare Your Image
- Crop to focus on main subject
- Convert to black and white
- Adjust contrast and brightness
- Simplify complex areas
2. Choose Conversion Settings
- Select appropriate stitch type (fill/satin)
- Set stitch density (higher for details)
- Determine color reduction (fewer colors = cleaner look)
3. Manual Adjustments
- Clean up jagged edges
- Enhance important features
- Add registration marks
- Optimize stitch direction
4. Test and Refine
- Stitch sample on scrap fabric
- Check for thread breaks or gaps
- Make necessary adjustments
- Create final version
Fabric Considerations
Different materials require different approaches:
Cotton/Linen:
- Standard stitch density works well
- Shows fine details clearly
Knit/Jersey:
- Needs stabilizer backing
- Lower density prevents puckering
Toweling:
- Requires longer stitches
- Simpler designs work best
Denim:
- Handles dense stitching
- Good for detailed portraits
Thread Selection Tips
Achieve photo-realistic results with:
- Variegated Threads – Create natural color transitions
- Rayon Threads – Vibrant colors for portraits
- Polyester Threads – Durability for frequently washed items
- Metallic Threads – Accent highlights and special effects
Troubleshooting Common Problems
Issue: Blurry or unrecognizable results
Fix: Start with higher contrast images
Issue: Excessive thread breaks
Fix: Reduce stitch density
Issue: Colors don’t match original
Fix: Manually adjust thread palette
Issue: Fabric puckering
Fix: Use proper stabilizer
Advanced Techniques
Elevate your photo embroidery with:
Layering: Combine different stitch types for texture
Trapunto: Add batting behind key areas for dimension
Mixed Media: Incorporate beads or sequins
Color Blending: Use multiple threads in one needle
Business Applications
Turn this skill into profit by offering:
- Pet Portrait Services – Always in high demand
- Family Tree Embroidery – Unique heritage gifts
- Landmark Souvenirs – Local scenery for tourists
- Memorial Pieces – Meaningful keepsakes
Preserving Your Work
Make embroidered photos last by:
- Using quality, colorfast threads
- Properly framing behind UV-protective glass
- Storing in acid-free materials
- Avoiding excessive sunlight exposure
Conclusion
Converting photos to embroidery patterns unlocks incredible creative possibilities, allowing you to stitch personal memories, create unique gifts, or even build a specialty business. While the process requires some practice, modern tools make it more accessible than ever.
Start with simple, high-contrast images as you learn the basics. As your skills grow, you’ll be able to tackle increasingly complex projects. Remember—every master embroiderer started with their first imperfect stitch-out.
Ready to create your first photo embroidery? Choose a meaningful picture and give it a try today. The satisfaction of holding a stitched version of a precious memory makes all the effort worthwhile.