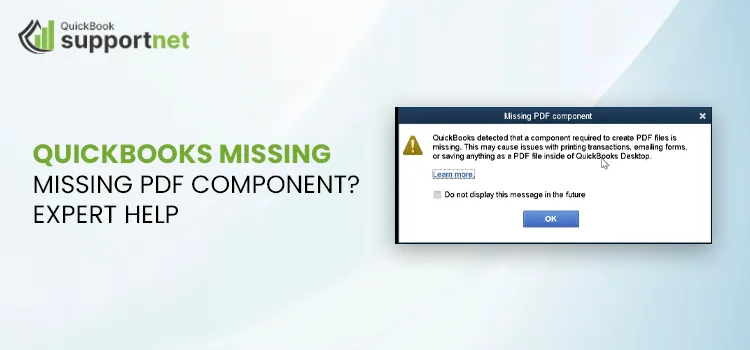
Are you facing QuickBooks Missing PDF Component error? This missing PDF component problem can indicate a major issue, as it prevents you from saving, emailing, or printing the documents, such as invoices or financial reports. You may meet this issue due to outdated software or damaged internal elements. This quick guide breaks down the root causes of the issue and provides straightforward troubleshooting steps to get your workflow back quickly and efficiently.
Fix QuickBooks Missing PDF Component errors quickly and easily. Resolve printing issues, generate reports, and get support now at +1-866-500-0076.
How to Fix QuickBooks Missing PDF Component Error?
To efficiently fix the QuickBooks missing pdf component Windows 11 fix, the most useful solution is to run the QuickBooks Print & PDF Repair Tool from the QuickBooks Tool Hub. You can also implement the other effective methods to resolve the issue.
Look at the following troubleshooting steps to address this issue significantly:
Solution 1. Run the QuickBooks Print & PDF Repair Tool
To run the QuickBooks Print & PDF Repair Tool from the QuickBooks Tool Hub, follow these concise steps:
Step 1. Download & install the QuickBooks Tool Hub
You can address the QuickBooks missing pdf component Windows 11 error by simply downloading and installing the QuickBooks Tool Hub.
- First, you must completely exit the application before running the tool hub to ensure it can repair background processes. For smooth performance, use Tool Hub on Windows 10, 64-bit.
- Close the QuickBooks software and download the latest version of the QB tool hub.
- Once it’s done, save the file in the folder where you can easily find it.
- If you have installed the Tool Hub already, then navigate to the Home tab to check the version you have.
- Go to the folder where you saved the downloaded file and double-click on the QuickBooksToolHub.exe file to open it.
- Afterward, carefully perform the on-screen steps to install and accept the rules and regulations of the Tool Hub.
- Once it’s done, double-click on the Windows icon to smoothly open the tool hub.
- You can search for the QuickBooks tool hub on the Windows search bar, in case you are unable to find it.
Step 2. Run the QuickBooks Print & PDF Repair Tool
- Open the QuickBooks Tool Hub and go to the Program Problems tab.
- Choose the QuickBooks Print & PDF Repair Tool and allow it roughly a minute to complete.
- Try to print, email, or save your document as a PDF in QuickBooks Desktop.
- If the error still persists, proceed to the next troubleshooting step given below.
Solution 2. Create a New Template or Form
- Here, you need to generate a fresh template for your form.
- Afterward, apply the new template to your current transaction.
- Try to export your PDF again.
Solution 3. Configure the Print Spooler Service Properties
- First, press the Windows + R keys, type Services.msc in the Run box, and hit OK.
- Search for the Print Spooler service in the list.
- Right-click on Print Spooler services and choose Properties.
- Set the Startup type to Automatic via the dropdown menu.
- Click Apply, then select OK to save changes.
- Right-click the service again and select Start to activate it.
- Try to save or email your PDF from QuickBooks Desktop to verify the fix.
- Solution 4. Restart and Reset your Temp Folder Permissions
Step 1. Start by restarting the computer
To resolve the QuickBooks missing pdf component error, you can restart your system and then try again. If this won’t fix the issue, then you need to reset the temp folder permissions. Here’s how:
Step 2. Steps to Reset the Temp Folder Permissions
- First, press the Windows key + R to open the RUN command and type %TEMP% and press Enter.
- Next, click right on the empty area of the temp folder, and then choose the Properties option.
- Choose the Security, ensure all the user names and groups in Security have full access.
- When the permissions have been set to Full Control, you can save as a PDF again in QuickBooks to fix the QuickBooks missing pdf component Windows 10.
Step 3. Test if you can print to your XPS
To troubleshoot PDF or email issues, test whether you can continue printing to the Microsoft XPS Document Writer outside of QuickBooks. This determines if the problem is with your Windows components or the QuickBooks software itself.
- Press the Windows key and type Notepad to open it.
- Next, you need to type test and choose the file, and then click print.
- Now, choose the XPS Document Writer, and then print again.
- If you are unable to see the XPS Document Writer, under such conditions, you will need to allow your system to print to your XPS printer.
- Give it a name and save it somewhere on your desktop.
- Navigate to the desktop where you saved the file and check the XPS document you printed from Notepad.
If you can not print to your XPS printer above QuickBooks, you’ll need to contact your IT professional or Microsoft for help to resolve the QuickBooks missing pdf component fix.
You should allow your system to print to your XPS printer
- Navigate to the Windows Start button and look for the Windows Control Panel, and select Category view.
- Next, select the Programs option.
- Choose the turn windows feature on/off from the Programs and Features.
- Verify the Microsoft XPS Document Writer in the list of services on your computer screen and then choose Ok.
To Wrap Up!
Resolving the QuickBooks Missing PDF Component error on Windows 10 or 11 can be addressed by using the QuickBooks Tool Hub, specifically the PDF & Print Repair Tool. You can also try additional steps to verify Print Spooler settings and TEMP folder permissions. Testing the XPS Document Writer helps identify if the issue is within Windows.
By following the above simple methods, you can get your accounting back on track and grow your business the way you want. Need help with QuickBooks Missing PDF Component error? Contact our experts for instant support and fix printing issues fast at +1-866-500-0076.


One thought on “QuickBooks Missing PDF Component: How to Fix It Easily?”
Comments are closed.